Getting Started
Learn how to quickly setup and get started on the pluv.io network.
For the most part, setting up @pluv/io on the pluv.io network is not too different from setting it up when self-hosting on either the Node.js or Cloudflare Workers runtimes. The following examples will assume an application running on Next.js.
Installation
Here is the example installation for npm.
# For the server
npm install @pluv/io @pluv/platform-pluv

# For the client
npm install @pluv/client @pluv/react
# Client peer-dependencies
npm install react react-dom zod @types/react @types/react-dom

# If you want to use storage features, install your preferred CRDT
# (yjs or loro)
npm install @pluv/crdt-yjs yjs

# Client + server peer dependencies
npm install zod
Create a project
To use pluv.io, you will need to create a project. Each project corresponds to one PluvIO instance that is created via @pluv/io's createIO function.
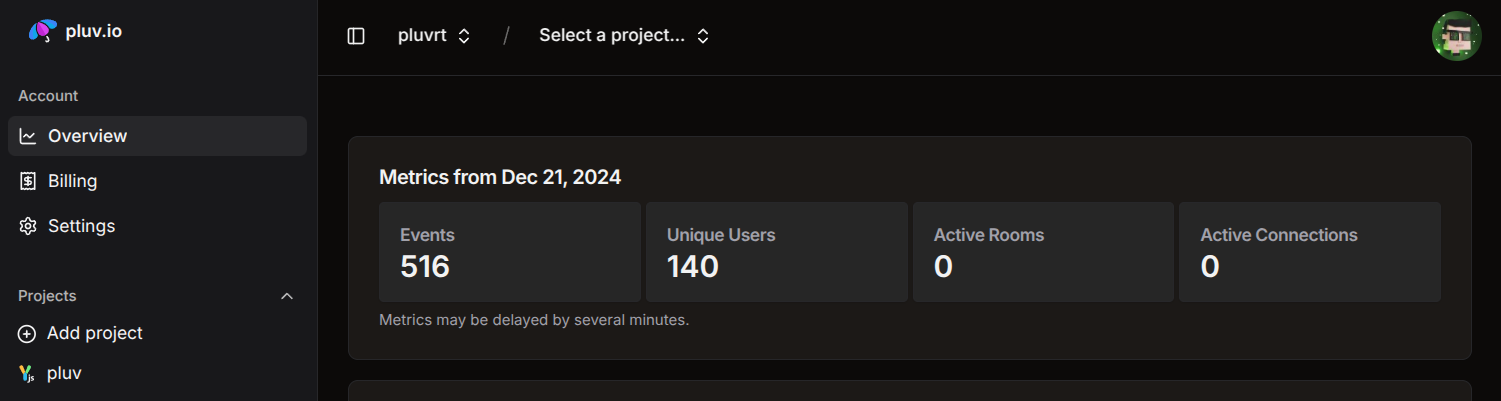
You can create a new project from the pluv.io dashboard by clicking on "Add project" from the sidebar.
Project CRDT
When creating a project, you can set the project's CRDT to either use yjs via @pluv/crdt-yjs or loro via @pluv/crdt-loro. Note that this selection cannot be changed once the project is created.

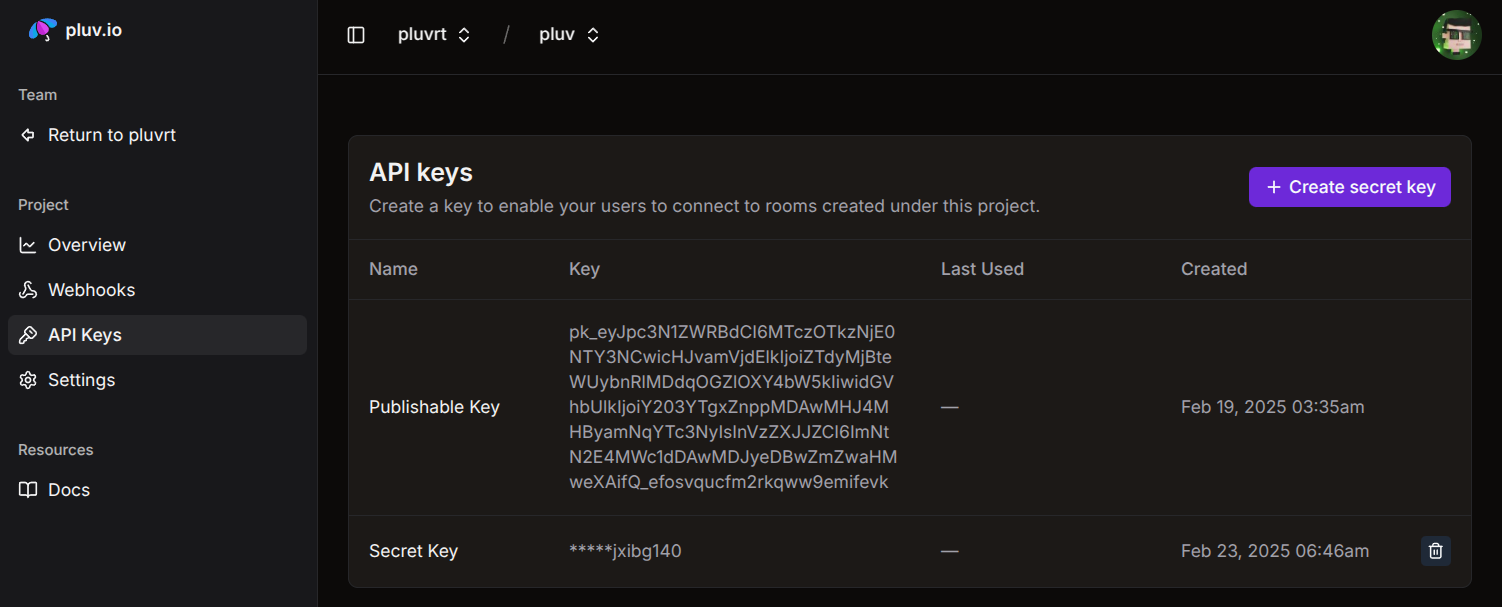
Project API Keys
In order for pluv.io to identify your project when using the @pluv/io library, you will need to create a secret key for your project. Both the secret and publishable keys must be copied and saved as environment variables for your app.
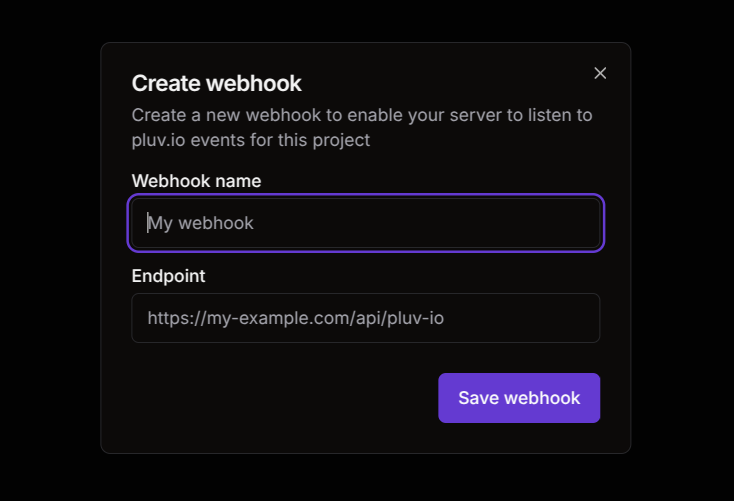
Project Webhooks
On @pluv/platform-pluv, server event listeners (i.e. getInitialStorage, onRoomDeleted, onUserConnected and onUserDisconnected) are webhooks that requite a webhook secret key to use. To create this, navigate to the Webhooks page, from the sidebar of the project dashboard, and click on the "Create webhook" button. This webhook secret key must be copied and saved as an environment variable for your app.
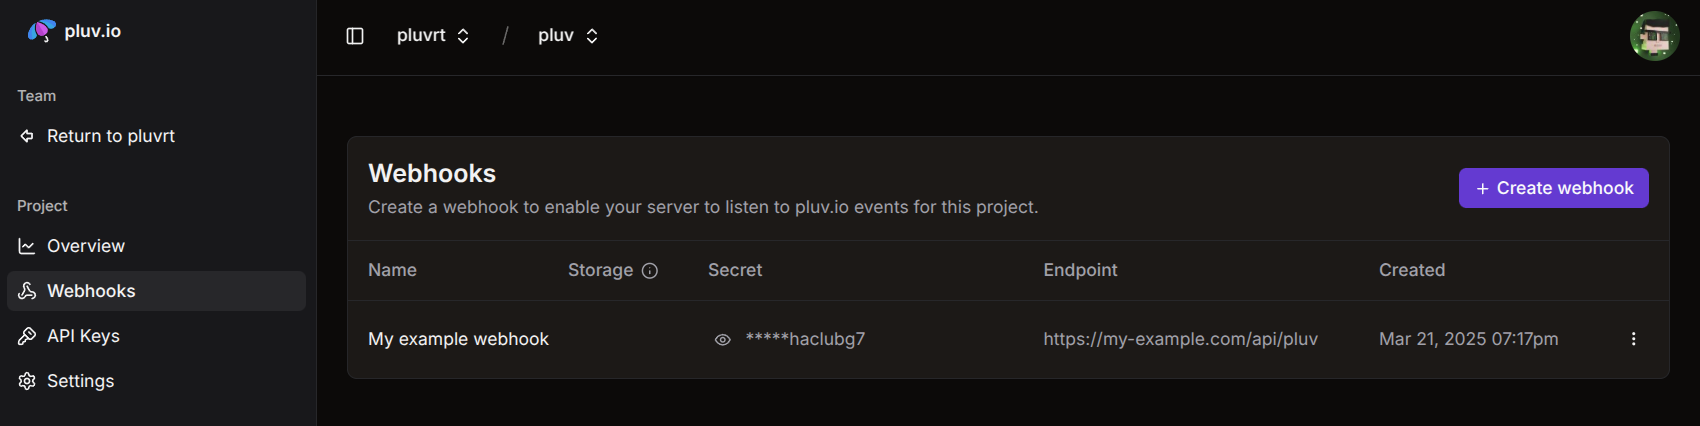
Note that the endpoint must be publicly accessable (i.e. not localhost), so we recommend using Ngrok or Cloudflare Tunnel for testing locally.
Setting up pluv.io on Next.js
Let's step through how we'd put together a real-time API for Next.js and connect to pluv.io end-to-end.
Defining a backend PluvIO instance
Similar to how @pluv/io is initialized for Node.js and Cloudflare, @pluv/platform-pluv is passed into createIO, but with parameters for publicKey, secretKey, webhookSecret and basePath.
// backend/pluv.ts

import { yjs } from "@pluv/crdt-yjs";
import { createIO } from "@pluv/io";
import { platformPluv } from "@pluv/platform-pluv";
import { z } from "zod";
import { db } from "./database";

export const io = createIO(
    platformPluv({
        // Required: Authorization is required for `@pluv/platform-pluv`
        authorize: {
            // Required: The user schema
            // Note: Must be JSON serializable
            // Note: Keep this schema lean (i.e. < 1,024 bytes) else errors
            // may be encountered
            user: z.object({
                // Required: id field is required
                id: z.string(),
                // All other fields are optional (whatever is needed to
                // represent users in the app)
                name: z.string(),
            }),
        },
        // Optional: Context that will be accessable from server event
        // listeners
        context: () => ({
            db,
        }),
        // Optional: Only if you require CRDT features
        // It must match what was configured when your project was created
        crdt: yjs,
        // Required: The API keys saved from the previous step
        publicKey: process.env.PLUV_PUBLISHABLE_KEY!,
        secretKey: process.env.PLUV_SECRET_KEY!,
        // Required: The route where your pluv webhooks will be located
        basePath: "/api/pluv",
    }),
);

export const ioServer = io.server();
Define an authorization endpoint
@pluv/platform-pluv requires setting up authorization unlike in the other platforms where it is optional. Define an endpoint to create and return an access token for the user that has access to the room. See Authorization for more detailed documentation.
// app/api/auth/pluv/route.ts

import { ioServer } from "./backend/pluv";

// Example stub, possibly to get the current user from cookies
import { getSession } from "./backend/auth";

export const GET = async (request: Request) => {
    const url = new URL(request.url);

    const { session } = await getSession(request);

    if (!session) {
        // If authorization fails, return any non-200 status code
        return new Response(
            JSON.stringify({ error: "Unauthorized" }),
            { status: 401 },
        );
    }

    const room = url.searchParams.get("room");

    // ... Implement your custom authorization here

    const token = await ioServer.createToken({
        room,
        user: {
            id: session.user.id,
            user: session.user.name,
        },
    });

    // If authorization succeeds, return the token as a text response
    // with a 200 status code
    return new Response(token, { status: 200 });
};
Enabling up server events
In order to enable server event handlers on the PluvServer, webhookSecret must be provided to createIO and the PluvServer.fetch function must be set-up at the basePath endpoint.
// app/api/pluv/route.ts

import { ioServer } from "./backend/pluv";

export const GET = ioServer.fetch;
export const POST = ioServer.fetch;
The example below sets the webhookSecret on the createIO function and sets all 4 event handlers that are supported for @pluv/platform-pluv onto the ioServer.
// backend/pluv.ts

export const io = createIO(
    platformPluv({
        // ...
        webhookSecret: process.env.PLUV_WEBHOOK_SECRET!,
        // ...
    }),
);

export const ioServer = io.server({
    // Optional: This handler is called when a room is created
    getInitialStorage: async ({ context, room }) => {
        const { db } = context;

        // Mock example mirroring drizzle-orm
        const encodedState = await db
            .select({ encodedState: room.encodedState })
            .where(eq(room.name, room))
            .limit(1)
            .then((result) => result[0]?.encodedState ?? null);

        return encodedState;
    },
    // Optional: This handler is called when a room is destroyed.
    // Rooms are destroyed when they are empty (i.e. no more active
    // connections)
    onRoomDeleted: async ({ context, encodedState, room }) => {
        const { db } = context;

        // Mock example mirroring drizzle-orm
        const roomId = const existing = await db
            .select()
            .where(eq(room.name, room))
            .limit(1)
            .then((result) => result[0]?.id ?? null);

        if (roomId === null) {
            await db
                .insert(room)
                .values({ encodedState, name: room });

            return;
        }

        await db
            .update(room)
            .where(eq(room.id, roomId))
            .set({ encodedState });
    },
    // Optional: This handler is called after a new connection is
    // established
    onUserConnected: async ({ context, encodedState, room, user }) => {
        // ...
    },
    // Optional: This handler is called after a connection is closed
    onUserDisconnected: async ({ context, encodedState, room, user }) => {
        // ...
    },
});
Create the client bundle
// frontend/pluv.ts

"use client";

import { createClient } from "@pluv/client";
import { yjs } from "@pluv/crdt-yjs";
import { createBundle, infer } from "@pluv/react";

// Use a type-import, since this will be used on the frontend
import type { ioServer } from "./backend/pluv";

// Create `types` outside of `createClient` due to TypeScript inference
// limitations
const types = infer((i) => ({ io: i<typeof ioServer> }));

// Note that the `wsEndpoint` param is omitted when using
// `@pluv/platform-pluv`
export const client = createClient({
    types,
    // Wherever your auth endpoint was
    authEndpoint: ({ room }) => `/api/auth/pluv?room=${room}`,
    publicKey: process.env.PLUV_PUBLISHABLE_KEY!,
});

// Destructure the bundle, as the app router will not allow accessing
// properties of objects within server components (e.g. you are unable to
// write pluv.PluvRoomProvider in a layout that is a server component)
export const {
    PluvRoomProvider,

    useStorage,
    useMyself,
    useOthers,
    useRoom,
    useTransact,

    // ... Other values as needed

    // Alternatively for things that will only be used in client components
    // (i.e. not server components)
    ...pluv,
} = createBundle(client);
Wrap the PluvRoomProvider
At the route the room's layout will be defined, wrap the page with the PluvRoomProvider that was destructured from the previous step. This is necessary to enable all other functions from createBundle.
// app/[room]/layout.tsx

import type { FC, ReactNode } from "react";

interface PageProps {
    children?: ReactNode;
    params: Promise<{ room: string }>;
}

const Page: FC<PageProps> = async (props) => {
    const { room } = await params;

    return (
        <PluvRoomProvider room={room}>
            {children}
        </PluvRoomProvider>
    );
};

export default Page;
And that's it! With this, functions (e.g. hooks) from createBundle can be used for pages within the layout.